CFD simulations involving 3D complex geometry have become the norm, however, this hasn’t lessened the…
Scripting Pointwise Meshing
Introduction
The August article features the scripting of a Pointwise mesh by using Pointwise’s Glyph scripting functionality. The publicly available Glyph script “CreateOH” is used to automatically create a 2D structured “O-H” surface mesh (domain) from a set of circular connectors.
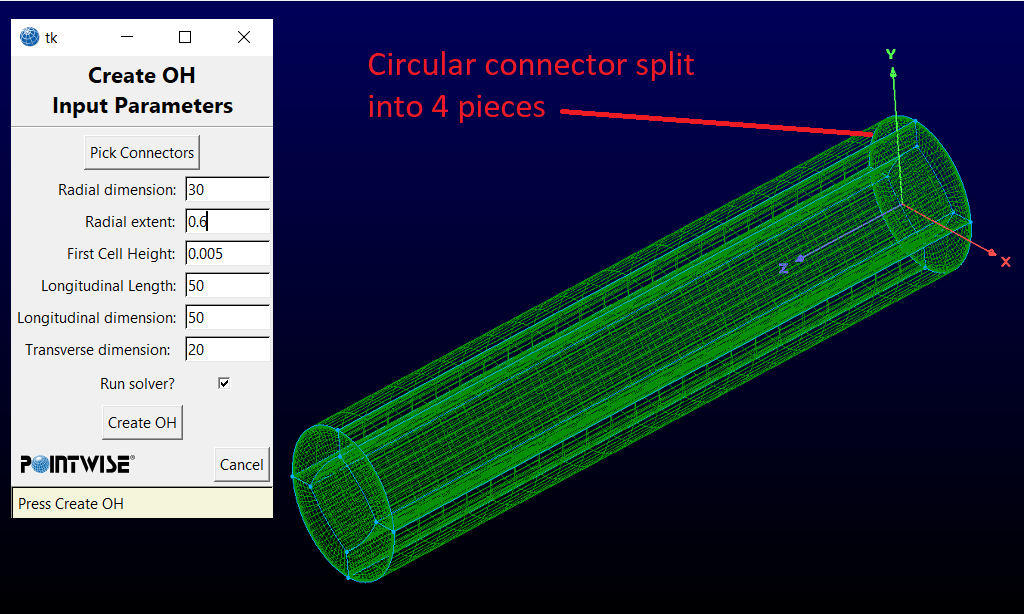
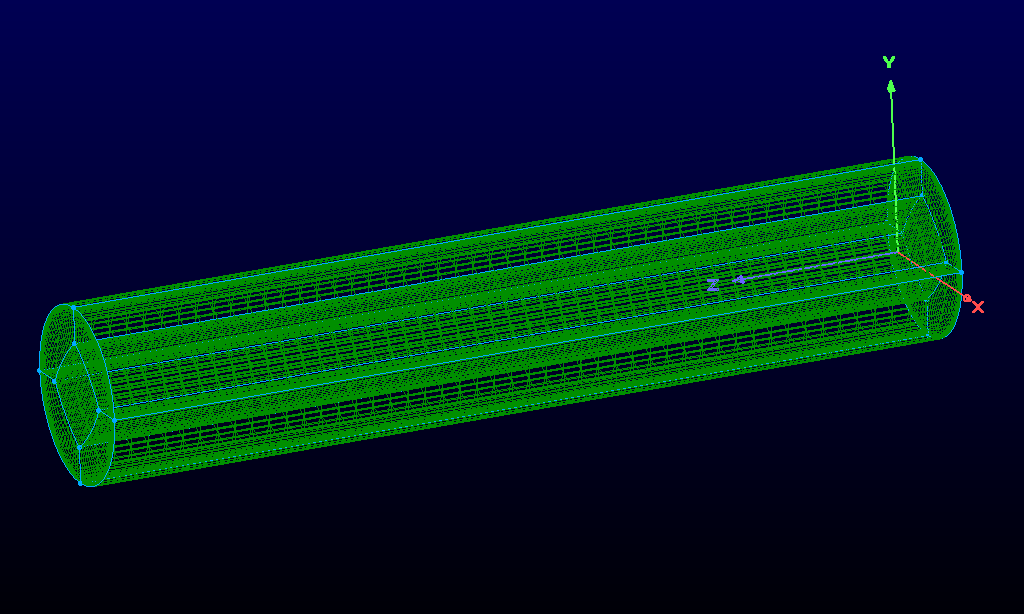
Some modifications were made to CreateOH (available on request) to take the 2D mesh and extrude into 3D elements, ready for a Computational Fluid Dynamics (CFD) analysis for flow inside a pipe (Figure 1) .
Why Script a Mesh?
Scripting the meshing process can certainly speed up and improve efficiency of the CFD work flow by automating repetitive meshing tasks, either in small parts of the mesh or the entire process. Scripting can also remove the variability in mesh quality for the meshes that are produced. This is especially important for Pointwise, which provides great flexibility in the way a mesh is created – leading to different steps, methods and mesh size parameters.
Pipeline Example
A simple pipeline geometry (Figure 1) with a structured “O-H” mesh topology was used to demonstrate the benefits of scripting the meshing process. If you haven’t read our previous blog on “O-H” structured meshing, you can go here to read it.
Running the Glyph Script
The CreateOH script creates a 2D mesh called a “domain” in the form of a the “O-H” structured mesh. In this blog we go further and extend the CreateOH script to extrude the 2D domain into a 3D volume elements. The longitudinal length and grid dimension of the extrude is user specified.
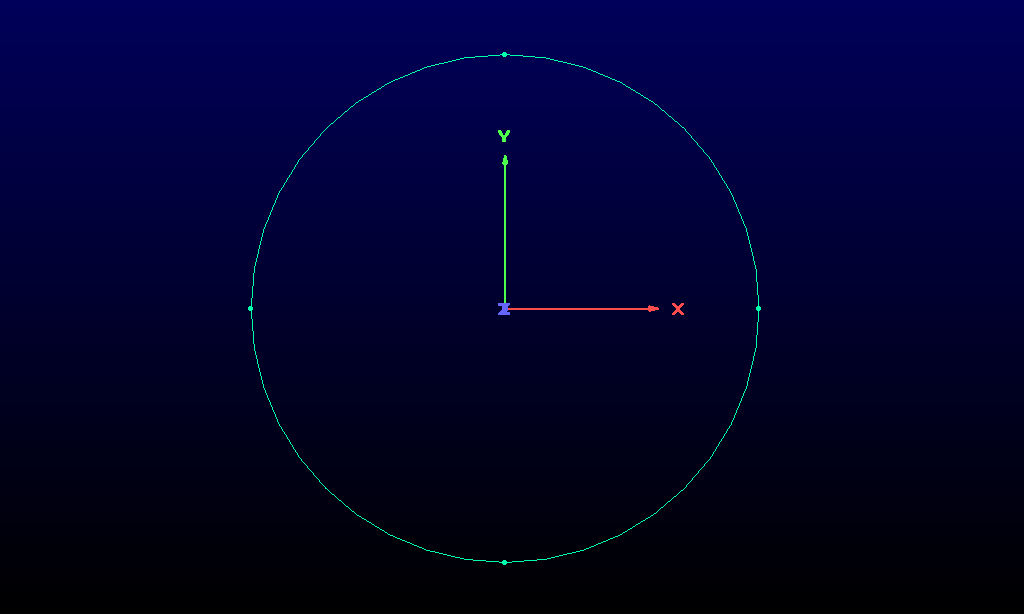
Step 1 – Create 4 circular connectors
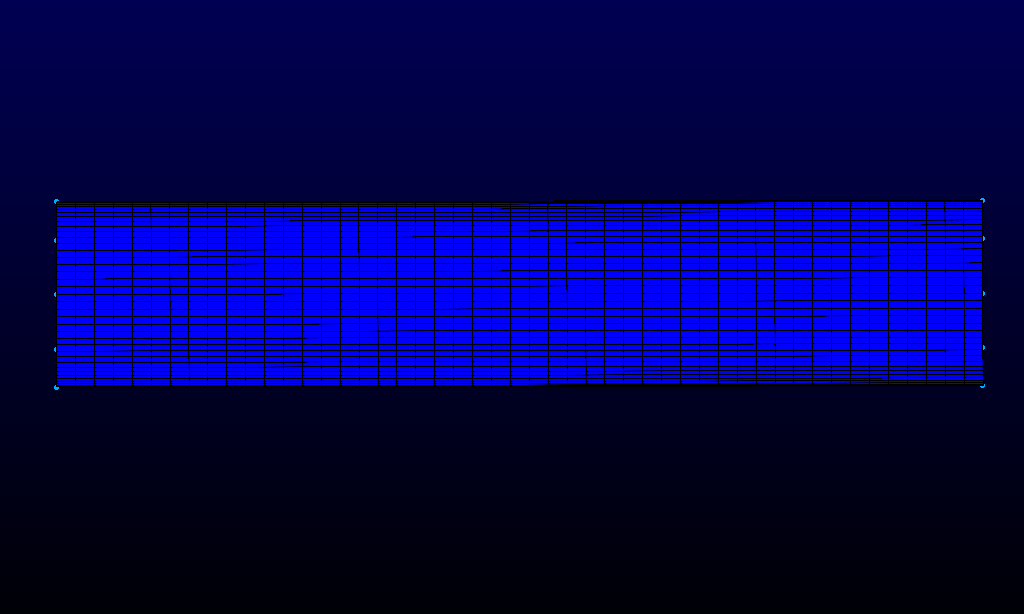
To run the script in Pointwise we first need a circular connector split into 4 pieces (Figure 2). This circular set of 4 connectors defines the diameter of the domain that is created, and which is eventually extruded into 3D elements. The set of connectors in Figure 2 is provided as an example with the CreateOH github repository (Example.pw).
Step 2 – Execute the CreateOH Script
Step 2 involves executing the script CreateOH.glf, where the 4 connectors become available for selection.
- In Pointwise, with the 4 connectors created, go to the menu and select Script- > Execute…
- A dialogue box will open, and the user can browse to the script, which is selected and the user can click Open.
Note that the connectors can be un-dimensioned initially, as their dimension will be specified in the CreateOH Tk widget.
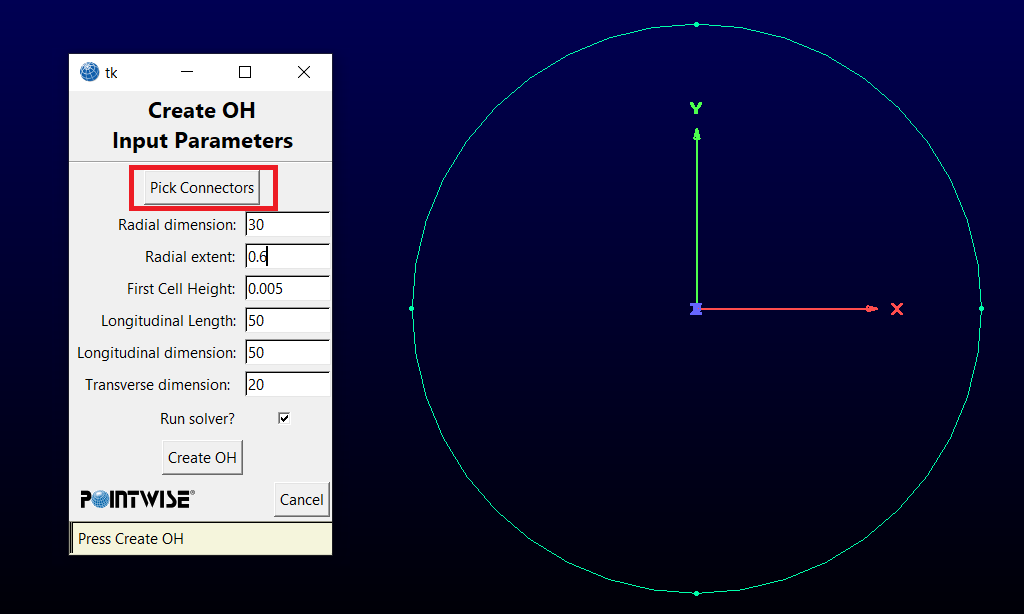
Step 3 – Pick 4 connectors
- Click “Pick connectors” on the Tk widget (Figure 3)
- Select the 4 connectors, then press “Done”.
Step 4 – Specify mesh parameters and create mesh
- Edit the default mesh parameters in the Tk widget, if required.
The input mesh parameters are: Radial dimension, Radial extent, First Cell Height, Longitudinal Length, Longitudinal dimension, as well as Transverse dimension. Note that in Pointwise the dimension refers to the connector dimension, which is the number of vertices that will be on the connector.
- Select click Create OH
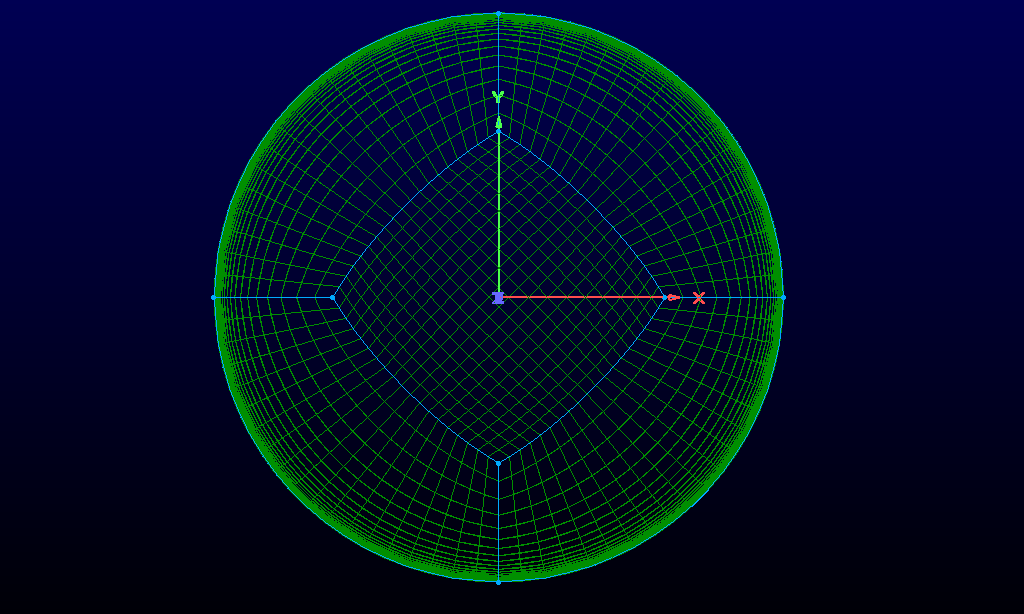
A 3D mesh of the internals of a pipe is automatically meshed, as shown in Figure 4-6.
Tk in Pointwise
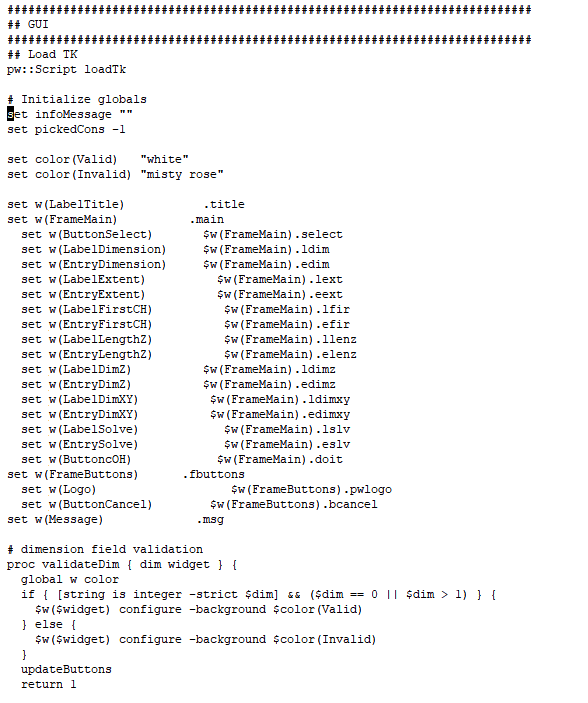
The Tk widget which opened after running CreateOH is a handy feature that allows to further customization of the Pointwise meshing process. Tk is an open source GUI widget toolkit used by various programming languages and software, including Pointwise. With Pointwise and Glyph scripting using Tk a “mini-GUI” can be created to control the input parameters to a given script.
Figure 7 shows a snippet of Glyph scripting that creates the Tk GUI. The Glyph script loads the Tk package, then sets valid colours, sets input fields, and then does a check of the specified parameter values against user numeric criteria (e.g. is an integer, range of values etc.).
Thanks for reading, the next edition will be later in September 2019. Until then, happy meshing!
To see more about our Pointwise distribution go here, or for a free trial of Pointwise, go here.
Related Posts

8.
Scripting Pointwise Meshing